- Locate the icon for ESET Endpoint Antivirus in the bottom right corner of the screen. Then, right click and select ‘Pause Protection’. A small popup will show up; select ‘Pause until reboot’ click ‘Apply’.
- Log in to your account to access the installation files. Follow the instructions and complete the installation. DO NOT REBOOT THE COMPUTER UPON FINISHING THE INSTALLATION.
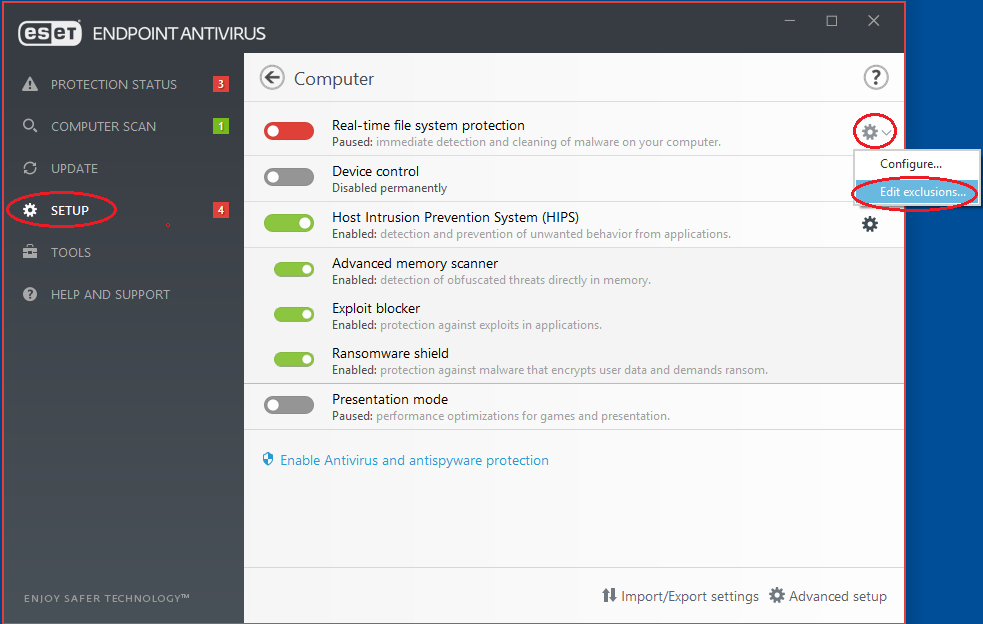
- Right click the ESET Endpoint Antivirus icon again and select ‘Open ESET Endpoint Antivirus 7’ to open the main menu. On the left hand side of the window should be a menu with different options. Select the tab titled ‘Setup’. After selecting this menu, locate the row titled ‘Real-time file system protection’ and click on the gear at the end of the row. This should open a drop down menu; select ‘Edit Exclusions’.
- In the Exclusions menu, click on ‘Add’ in the bottom left corner. A window will pop up asking what type of exclusion and what path to exclude. For type, select ‘Exclude path’; for path, click on the three ellipses at the end of the empty box. You need locate and exclude the installation folder path, which can be found in the dashboard under Settings > Account Information > Paths to Exclude for Anti-virus software, or via the popup window after selecting to download the installer file. Important Note: The path excluded in this example will be different then the path you must exclude for your account as this folder is randomized. Please use the path located in your account. Click ‘OK’ and then ‘Save’. This will exclude the file while allowing your antivirus to protect you.
- Reboot the computer to complete the installation.
Article ID: 126, Created: 10/4/2018 at 4:38 PM, Modified: 8/6/2019 at 9:00 PM